Contouring and highlighting are makeup techniques that define and enhance facial features using light and shadow. This guide will walk you through the basics, tools, and techniques to master these transformative methods.
What is Highlight and Contour?
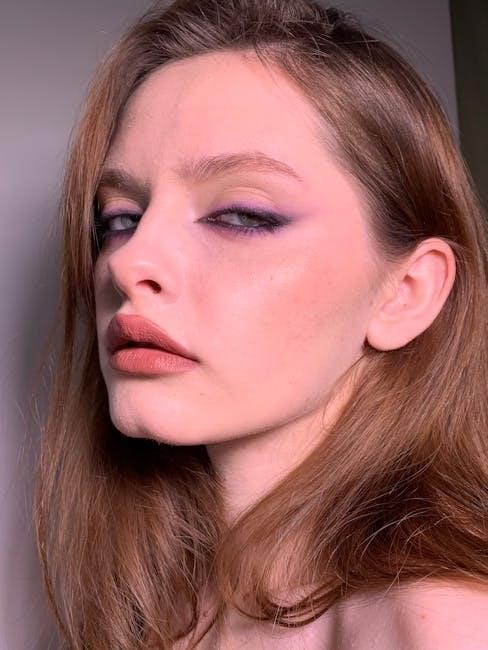
Highlighting and contouring are makeup techniques used to define and enhance facial features. Highlighting involves applying lighter shades to areas you want to brighten, such as cheekbones, nose, and cupid’s bow, creating a natural glow. Contouring uses darker shades to create depth and shadow, typically applied to areas like the hollows of the cheeks, temples, and jawline. Together, these techniques create the illusion of structure and dimension, helping to shape and balance your face for a polished, professional look. These methods are versatile and can be tailored to suit any skin tone or face shape.
The Importance of Highlight and Contour in Makeup
Highlighting and contouring are essential techniques in makeup that enhance facial features and create balance. By strategically placing light and dark shades, these methods define cheekbones, slim the nose, and add depth to the face. Highlighting brightens areas like the cheekbones and brow bones, giving a radiant glow, while contouring creates shadows that shape and sculpt. These techniques allow for customization based on face shape and skin tone, making them versatile for all beauty goals. Whether for a natural look or a dramatic transformation, highlight and contour are fundamental skills in achieving a polished, professional finish.
Understanding Skin Tone and Product Selection
Skin tone plays a crucial role in selecting contour and highlight products. Choose contour shades 1-2 tones darker and highlighters 1-2 shades lighter than your skin. Fair skin suits cool tones, while medium to dark skin looks best with warmer shades. Always match your undertones for a natural finish.
Choosing the Right Contour Shade for Your Skin Tone
Selecting the perfect contour shade enhances your natural features. For fair skin, opt for light, cool-toned shades to avoid harshness. Medium skin tones can use slightly deeper neutrals, while dark skin looks stunning with rich, deep shades. Ensure the contour is 1-2 tones darker than your foundation for a subtle, natural look. Avoid overly red or orange tones, as they can appear unnatural. Instead, choose shades with a grayish or neutral base to mimic shadows. Always test the color on your jawline to find the most flattering match. Proper blending is key to avoiding harsh lines.
Selecting the Perfect Highlighter for Your Undertones
The right highlighter enhances your natural glow by complementing your skin’s undertones. For fair skin, opt for pearly or pink-toned highlighters to create a soft, radiant look. Medium skin tones shine with champagne or golden hues, while dark skin tones glow beautifully with bronze or deep golden highlighters. Liquid or cream formulas are ideal for a seamless blend and natural finish. Avoid overly sparkly products, as they can appear unnatural. Always choose a shade close to your skin tone for a believable glow. Proper application ensures a flawless, lit-from-within appearance.
Tools and Brushes for Contouring and Highlighting
Essential tools include contour brushes, highlighter sponges, and blending brushes. These help create sharp definition and seamless transitions, ensuring a professional finish.
Best Brushes for Applying Contour
The right brush ensures precise contour application. Angled brushes are ideal for defining cheekbones and jawlines, while fluffy brushes blend contour seamlessly. For powder, use soft-bristle brushes, and for cream, opt for flat, dense brushes. A small shadow brush is perfect for contouring the nose. proper tools enhance your makeup, creating a natural, sculpted look.
Essential Tools for Blending
Blending is crucial for a seamless contour and highlight. Beautyblenders or makeup sponges gently merge colors for a natural finish. Fluffy brushes with soft fibers buff powder, preventing harsh lines. For creams, use your fingers to warm the product, ensuring a smooth blend. A light touch and the right tools create a flawless, professional look.
Step-by-Step Guide to Contouring
Start by prepping your face with primer and foundation for a smooth base. Map your contour areas, focusing on the hollows of your cheeks, temples, and jawline. Apply contour shades with an angled brush, blending thoroughly to avoid harsh lines. Use light strokes and build gradually for a natural look. Blend upward and outward for a seamless finish, ensuring no visible edges remain. This technique creates definition and enhances your natural features effortlessly.
Prepping Your Face: Primer and Foundation
Properly prepping your face with primer and foundation is essential for a smooth contouring and highlighting application. Start by applying a lightweight primer to create an even canvas, allowing your makeup to last longer and blend seamlessly. Follow with your usual foundation, ensuring full coverage and a natural finish. This step ensures that your contour and highlight products adhere evenly, creating a flawless base for defining your features. A well-prepped face guarantees that your makeup looks polished and professional, making the contouring process more effective.
Mapping Your Face for Contour
Mapping your face for contour involves identifying key areas to enhance and define. Start by locating the natural hollows of your cheeks—suck in your cheeks to find the target zone. Apply contour along the sides of your nose to slim it and under your jawline for a defined look. Lightly shade the temples and forehead for a slimmer appearance. Use a light hand to avoid harsh lines and blend well. Remember, contouring should create subtle shadows that enhance your natural features without looking artificial. This step sets the foundation for a balanced, sculpted look.
Applying Contour to Key Areas
Applying contour to key areas requires precision and a light hand. Start by shading the hollows of your cheeks, using an angled brush or contour tool. Gently sweep the product from the top of the hollow toward the center of your face, stopping about an inch from your mouth. Next, contour the sides of your nose by blending two thin lines from the bridge down to the tip. For a slimmer jawline, apply contour just below the bone, blending upward toward the ear. Use soft, feathery strokes to avoid harsh lines and build coverage gradually for a natural look. Always blend thoroughly to ensure a seamless finish.
Mastering the Highlight Technique
Highlighting enhances your natural glow by applying light shades to high points. Focus on cheekbones, brow bones, nose tip, and cupid’s bow for a radiant, lifted appearance.
Identifying High Points of Your Face
The high points of your face are areas where natural light hits first, such as the tops of cheekbones, brow bones, nose tip, cupid’s bow, and inner eye corners. Highlighting these areas creates a radiant, lifted appearance. Use a shade close to your skin tone for a subtle glow or slightly lighter for more definition. Liquid or cream highlighters work best for precise application. Avoid over-highlighting to maintain a natural look. Properly identifying these points ensures your highlighter enhances your features without appearing artificial or excessive. This step is key to achieving a balanced, polished makeup look.
Applying Highlighter for a Natural Glow
For a natural glow, apply highlighter sparingly to high points like cheekbones, brow bones, and the nose tip. Use a light hand to dab liquid or cream highlighter with fingers or a brush. Start with a small amount and blend well to avoid harsh lines. Ensure the shade complements your skin tone—pearl for fair, golden for medium, and bronze for deep tones. Avoid excessive sparkle; opt for subtle shimmer. Blend seamlessly into foundation for a soft, radiant finish. This technique enhances your features without looking artificial, creating a fresh, illuminated appearance.
Blending Techniques for a Seamless Look
Blending is key to achieving a natural contour and highlight effect. Use sponges or brushes to merge colors smoothly, ensuring no harsh lines remain. Flawless finish guaranteed.
Using Sponges for Smooth Blending
Sponges are ideal for blending contour and highlighter, creating a seamless finish. Dampen the sponge and gently dab across the areas where the products meet. This technique softens harsh lines and ensures a natural transition between shades. For best results, use a light touch and build coverage gradually. Sponges are particularly effective for cream and liquid formulas, as they help merge the products into the skin for a flawless, airbrushed effect. Regular cleaning and replacing sponges maintains hygiene and optimal blending performance.
Buffing with Brushes for a Flawless Finish
Buffing with brushes is essential for achieving a smooth, polished look when contouring and highlighting. Use a fluffy brush for powder products, gently sweeping in circular motions to blend edges seamlessly. For contour, an angled brush allows precise application along the hollows of the cheeks and jawline. Hold the brush softly to avoid harsh lines, blending upward and outward for a natural effect. Buffing ensures the products melt into the skin, creating a subtle, sculpted finish. This technique is particularly effective for powder formulas, enhancing definition while maintaining a natural appearance. Regular brush cleaning ensures optimal blending performance.

Common Mistakes to Avoid
Over-contouring and excessive highlighting are frequent errors, leading to unnatural results. Ensure subtle transitions by blending thoroughly and using shades that complement your skin tone for a natural look.
Over-Contouring and How to Fix It
Over-contouring occurs when dark shades are applied too heavily, creating harsh lines that don’t blend naturally. To fix this, use a damp beauty blender or fluffy brush to soften the edges. Gently buff the area in circular motions to merge the contour with your skin tone. Avoid using shades that are too dark for your complexion. Instead, opt for lighter, buildable products and apply them sparingly. Remember, the goal is to enhance, not to drastically alter your features. Blend thoroughly for a seamless, natural-looking contour.
Highlighting Errors and Solutions
Common highlighting mistakes include applying too much product, choosing the wrong shade, or placing highlighter incorrectly. To avoid these, select a highlighter that complements your skin tone—pearl for fair skin, golden for medium, and deep bronze for dark tones. Apply sparingly to high points like cheekbones, brow bones, and cupid’s bow. Use a light hand and blend well with fingers or a brush. For overdone highlights, dab with a damp sponge or buff with powder. This ensures a natural, radiant glow without looking excessive or artificial. Balance is key for a polished look.
Contouring and Highlighting for Different Face Shapes
Tailor your contour and highlight techniques to enhance your face shape. Round faces benefit from slimmer cheekbones, while oval faces accentuate symmetry. Square faces soften angles, and heart-shaped faces balance features.
Round Face: Slimming and Defining
For round faces, contouring focuses on creating length and definition. Apply contour along the sides of your face, starting from the temples and blending downward toward the jawline. Highlight the center of your forehead, the bridge of your nose, and the tip of your chin to draw light to these areas. This technique creates a slimmer, more balanced appearance. Use soft, blendable products and avoid harsh lines. Pair with subtle highlighting on the high points of your face to enhance natural contours without adding width. Blending is key to achieving a seamless, natural look.
Oval Face: Enhancing Natural Symmetry
Oval faces are naturally balanced, but contouring and highlighting can further enhance their symmetry. Apply contour to the sides of your face, starting from the temples and blending downward toward the jawline, to create subtle definition. Highlight the high points, such as the forehead, bridge of the nose, and chin, to draw light and enhance your natural structure. Use soft, blendable products to avoid harsh lines. For oval faces, the key is to maintain balance while adding depth. Lightly contour under the cheekbones to create a soft, sculpted look without disrupting the face’s natural harmony. Blend thoroughly for a seamless finish.
Square Face: Softening Angles
For square faces, contouring and highlighting aim to soften strong angles and create a more balanced look. Apply contour to the temples and jawline to reduce angularity, blending upward and outward for a slimmer appearance. Highlight the forehead, bridge of the nose, and chin to draw light and soften sharp features. Use light, buildable products and blend precisely to avoid harsh lines. This technique creates a more oval-like symmetry while maintaining your natural structure. Focus on subtle definition to enhance your features without accentuating the square shape.
Heart-Shaped Face: Balancing Features
For heart-shaped faces, contouring and highlighting aim to balance the broader cheekbones and temples with a narrower chin. Apply contour to the hollows of the cheeks and along the jawline to create a slimmer appearance. Highlight the center of the forehead and the tip of the nose to draw light and enhance symmetry. Blend upward and outward to soften angles, avoiding harsh lines. This technique creates a more proportional look by minimizing width at the temples while emphasizing the lower face. Use light, buildable products for a natural finish that complements your features without over-defining them.
Take your contouring and highlighting skills to the next level with layering and texture manipulation. Mix cream and powder products for depth and dimension, ensuring seamless blending for a polished look. Layering contour and highlight products enhances dimension and creates a natural-looking sculpted effect. Start with a cream contour base for a soft definition, then add powder to intensify shadows. For highlights, apply a liquid formula first and finish with a powder highlighter for a radiant glow. This technique allows for buildable coverage and a seamless blend, ensuring your makeup looks polished and professional. Proper blending with sponges or brushes is key to avoiding harsh lines and achieving a cohesive finish. Cream and powder products offer distinct benefits for contouring and highlighting. Creams provide a natural, blendable finish and are ideal for creating soft, subtle definition. They are especially effective for fair skin or those seeking a minimalist look. Powders, on the other hand, are great for setting cream products, adding depth, and creating long-lasting results. For a seamless application, use fingers or a damp brush for creams and a fluffy brush for powders. Choose based on your skin type and desired finish, layering for added dimension without caking. Proper blending ensures a polished, professional appearance.Advanced Techniques for Experienced Users
Layering Products for Depth
Using Cream vs. Powder Products
Mastering highlight and contour requires practice. Start with light layers, blend thoroughly, and tailor techniques to your face shape and skin tone for a natural, enhanced look.
Maintaining a Natural Look
To keep your contour and highlight subtle, choose products that match your skin tone and undertones. Use light layers and blend well to avoid harsh lines. Avoid over-contouring by staying within the natural shadows of your face. Highlighter should be applied sparingly to high points like cheekbones, brow bones, and the tip of the nose. Ensure the highlighter is one to two shades lighter than your skin tone for a believable glow. Blend with a sponge or brush for a seamless finish, and pair with soft blush tones to maintain a natural appearance.
Practicing for Perfect Results
Consistent practice is key to mastering contour and highlight techniques. Start with minimal product and gradually build coverage as needed. Use a mirror to observe how light and shadow interact with your features. Experiment with different tools, such as brushes or sponges, to find what works best for you. Watching tutorials can provide valuable insights, but remember to tailor techniques to your face shape and skin tone. Patience is essential—each practice session brings you closer to achieving a flawless, natural-looking contour and highlight.
Additional Resources
Explore tutorials, videos, and product reviews to deepen your knowledge of contouring and highlighting. These resources offer expert tips and product recommendations for all skin types.
Recommended Tutorials and Videos
For a deeper understanding, explore expert-led tutorials and videos that demonstrate contouring and highlighting techniques tailored to various face shapes and skin tones. These resources provide step-by-step guidance, including product recommendations and application tips. Platforms like YouTube offer a wealth of content from makeup artists like Ashleigh Ciucci and Troy Surratt, who share professional insights. Additionally, websites such as Allure feature detailed guides and product reviews, ensuring you find the tools and methods that suit your needs. These resources are essential for mastering the art of contouring and achieving a natural, polished look.
Best Products for Contouring and Highlighting
Discover the top products recommended for contouring and highlighting, including the Honest Beauty Contour & Highlight Kit for a natural finish, Benefit Cosmetics Dallas powder for a soft contour, and Kevyn Aucoin The Sculpting Contour Powder for precise shading. For highlighters, Nars Illuminator in Copacabana (light skin) or Laguna (dark skin) offers a believable glow. Tools like the Smashbox Fan Brush and Beautyblender ensure seamless blending. These products, endorsed by experts, help create a sculpted, defined look tailored to your skin tone and face shape, making them essentials for your makeup routine.