
The Schumacher 2 10 50 Amp charger is a versatile tool for maintaining vehicle batteries, offering multiple charge rates for diverse needs.
This manual provides essential guidance for safe and effective operation, ensuring optimal battery health and longevity.
Overview of the Charger
The Schumacher SC-1316 2/10/50 Amp Battery Charger is a robust and adaptable charging solution designed for a wide range of 12-volt lead-acid batteries. This charger boasts three distinct amperage settings – 2A, 10A, and 50A – allowing users to tailor the charging process to the specific battery size and condition.
Its versatility makes it suitable for automotive, marine, and even heavy-duty applications. Equipped with LED indicators, the charger provides real-time feedback on the charging status, ensuring users are informed throughout the process. The unit is built with durability in mind, featuring a rugged construction to withstand demanding environments.
Target Users and Applications
This Schumacher battery charger is ideal for automotive enthusiasts, DIY mechanics, and professionals requiring a reliable battery maintenance solution. Car owners needing to recharge batteries during off-season storage will find the lower amperage settings beneficial. Mechanics can utilize the 50A setting for quicker charging of larger batteries in trucks or SUVs.
Marine applications, such as boats and personal watercraft, also benefit from its capabilities. Furthermore, it’s suitable for maintaining batteries in RVs, motorcycles, and even some industrial equipment. Essentially, anyone with a 12-volt lead-acid battery can utilize this charger effectively.
Understanding the Manual
The manual details crucial operating procedures, safety guidelines, and troubleshooting steps for the Schumacher charger, ensuring users maximize performance and prevent potential hazards.
Importance of Reading the Manual
Prior to utilizing the Schumacher 2 10 50 Amp Battery Charger, thoroughly reviewing the provided manual is absolutely essential. This document contains critical safety instructions, preventing potential damage to the charger, the battery, and, most importantly, yourself. Ignoring these guidelines could lead to electrical shock, fire hazards, or battery explosion.
The manual details proper connection procedures, appropriate charging modes for different battery types, and clear explanations of the LED indicator functions. Understanding these aspects ensures optimal charging performance and extends the lifespan of your battery. Familiarizing yourself with the troubleshooting section can also save time and prevent unnecessary service calls. Always prioritize safety and informed operation by reading the manual carefully.
Manual Contents Breakdown
The Schumacher 2 10 50 Amp Battery Charger manual is logically structured for easy navigation. It begins with crucial safety precautions, covering general guidelines, electrical safety, and specific battery handling instructions. Following this, a detailed section outlines the charger’s features and specifications, including voltage, current outputs, and charging mode explanations (2A, 10A, 50A).
A significant portion is dedicated to operating instructions – connecting the charger, selecting the correct mode, and monitoring the charging process. The manual also includes a comprehensive troubleshooting guide addressing common issues like power-on failures or charging problems, alongside explanations of error codes. Finally, maintenance and warranty information ensures long-term usability and support.

Safety Precautions
Prioritize safety when using the Schumacher charger. Always wear eye protection, ensure adequate ventilation, and disconnect power before making connections to prevent sparks or electrical shock.
General Safety Guidelines
Before operating the Schumacher charger, carefully review all instructions and warnings. This device is intended for charging 12-volt lead-acid batteries only; improper use could cause damage or injury. Never charge a frozen battery, as it may explode. Always work in a well-ventilated area to prevent the accumulation of hydrogen gas, which is flammable.
Keep the charger dry and away from flammable materials. Do not disassemble the charger; repairs should only be performed by qualified personnel. Ensure the charger is unplugged before connecting or disconnecting clamps from the battery. Avoid touching the clamps while the charger is operating to prevent accidental shocks. Regularly inspect the charger and cables for damage, and replace any worn or damaged components immediately.
Electrical Safety Instructions
To prevent electrical shock, always ensure the power cord is in good condition and properly grounded. Never operate the charger with a damaged cord or plug. Avoid using extension cords unless absolutely necessary, and if used, ensure they are of sufficient gauge to handle the charger’s amperage. Do not expose the charger to rain or moisture, as this increases the risk of electrical hazard.
Always disconnect the charger from the AC power source before making any connections or disconnections to the battery. Never touch the charger’s clamps or battery terminals while the charger is energized. If the charger malfunctions or exhibits signs of electrical damage, immediately discontinue use and consult a qualified technician.
Battery Safety Considerations
Batteries produce explosive gases during charging; therefore, ensure adequate ventilation. Avoid creating sparks or open flames near the battery, as this could ignite the gases. Always wear appropriate eye protection (safety glasses or a face shield) and gloves when working with batteries to prevent acid contact. Inspect the battery for cracks or leaks before charging – do not charge a damaged battery.
Different battery types (lead-acid, AGM, gel) require specific charging procedures; consult the battery manufacturer’s recommendations. Improper charging can damage the battery or create a safety hazard. Never attempt to charge a frozen battery, as it may rupture.

Charger Features and Specifications
This charger boasts 2A, 10A, and 50A charging modes, alongside LED indicators for status monitoring. It’s designed for 12V batteries, offering versatile power solutions.
Technical Specifications (Voltage, Current)
The Schumacher 2 10 50 Amp Battery Charger is specifically engineered for 12-volt battery systems, commonly found in cars, trucks, and various other vehicles. Its input voltage operates on standard 120V AC power. The charger delivers three distinct current outputs: a low 2 Amp setting ideal for trickle charging and maintaining smaller batteries, a mid-range 10 Amp setting for general-purpose charging, and a high 50 Amp setting designed for rapid charging of larger, deeply discharged batteries.
It’s crucial to select the appropriate amperage based on the battery’s size and state of discharge to prevent overcharging or damage. The charger’s automatic voltage compensation ensures optimal charging performance across varying temperatures and battery conditions, maximizing efficiency and extending battery lifespan.
Charging Modes (2A, 10A, 50A)
The Schumacher charger offers three versatile charging modes to accommodate diverse battery needs. The 2 Amp mode is perfect for maintaining fully charged batteries or slowly reviving deeply discharged smaller batteries, preventing damage from overcharging. The 10 Amp mode provides a balanced charging rate suitable for most automotive batteries, offering a good compromise between speed and safety.
For larger batteries or those requiring a quick boost, the 50 Amp mode delivers a rapid charge. However, use this mode cautiously, as excessive current can overheat or damage the battery. Always consult the battery manufacturer’s recommendations before selecting a charging mode, ensuring optimal performance and longevity.
LED Indicator Functions
The Schumacher charger utilizes a series of LED indicators to communicate the charging process status. A solid red LED typically signifies the charging phase is active, indicating current is flowing to the battery. A flashing red LED may signal a detected issue, such as reversed polarity or a faulty battery. A solid green LED generally confirms the battery is fully charged and ready for use, or that the charger is in maintain mode.
Understanding these indicators is crucial for safe and effective operation. Refer to the full manual for specific error code interpretations related to flashing patterns, ensuring prompt troubleshooting and preventing potential damage.

Operating Instructions
Proper operation involves securely connecting the clamps to the battery terminals, selecting the appropriate charging mode, and closely monitoring the charging process for optimal results.
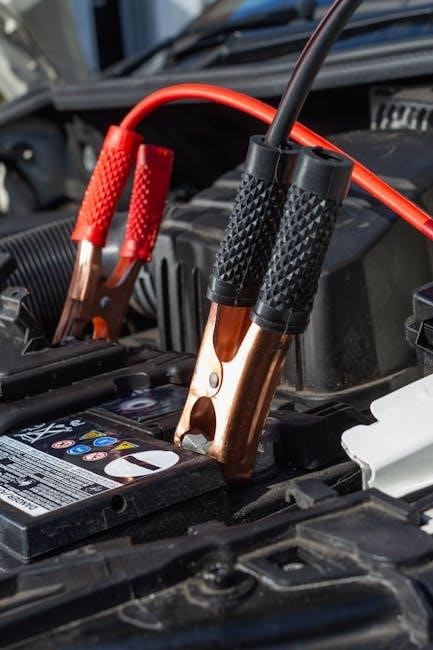
Connecting the Charger to the Battery
Before connecting, ensure the charger is switched off. Identify the positive (+) and negative (-) terminals on the battery. Attach the red clamp to the positive terminal and the black clamp to the negative terminal, ensuring a firm and secure connection.
Double-check the polarity – reversing the connections can cause severe damage to both the charger and the battery. Avoid any contact between the clamps, and ensure they don’t touch any flammable materials. A good connection is crucial for efficient charging; loose clamps can cause sparking and reduced charging effectiveness. Always connect in a well-ventilated area.
Selecting the Correct Charging Mode
The Schumacher charger offers 2A, 10A, and 50A charging modes. For small batteries like those in motorcycles or lawnmowers, use the 2A setting. The 10A mode is suitable for standard automotive batteries, providing a balanced charge rate;
Utilize the 50A mode for larger batteries or when a quicker charge is needed, but be cautious as it generates more heat. Always refer to the battery manufacturer’s recommendations for the appropriate charge rate. Incorrect mode selection can lead to overcharging, undercharging, or battery damage. Ensure the selected mode aligns with the battery’s capacity.
Monitoring the Charging Process
Regularly check the battery voltage during charging using a multimeter for accurate readings. The LED indicators on the charger provide a visual status: red typically indicates charging, while green signifies a full charge.
Avoid leaving the charger unattended for extended periods, especially when using the 50A mode. Monitor the battery temperature; excessive heat suggests a potential issue. Once the green light illuminates, disconnect the charger promptly to prevent overcharging and potential battery damage. Consistent monitoring ensures safe and efficient battery restoration.

Troubleshooting Common Issues
Addressing charger malfunctions is crucial for restoring functionality. This section details solutions for issues like power failures, charging problems, and deciphering error codes.
Charger Not Powering On
If the Schumacher charger fails to power on, begin by verifying the AC power source. Ensure the outlet is functioning correctly by testing it with another device. Next, inspect the charger’s power cord for any visible damage, such as cuts or exposed wires, and replace if necessary.
Confirm the power switch is firmly in the ‘ON’ position. A blown internal fuse could also be the culprit; consult the manual for fuse replacement instructions. If these steps don’t resolve the issue, there might be an internal component failure requiring professional repair or replacement. Always disconnect the charger from the power source before inspecting or replacing any parts.
Battery Not Charging
If the battery isn’t charging, first double-check the clamp connections to the battery terminals. They must be clean, secure, and making good contact – corrosion can impede the charging process. Verify correct polarity; red to positive (+) and black to negative (-).
Ensure the selected charging mode (2A, 10A, or 50A) is appropriate for the battery’s size and type. A severely discharged or sulfated battery may require a longer charging time or a specialized desulfation mode if available. If the charger indicates an error, consult the error code section of this manual. A faulty battery itself could also be the reason.
Error Codes and Their Meanings
The Schumacher charger utilizes LED indicators to display error codes, signaling potential issues during operation. A flashing red light often indicates reversed polarity – immediately disconnect and correct the connections. A solid red light may signify an overvoltage or overheating condition; allow the unit to cool down.
If a flashing green light appears, it could indicate a sulfated battery requiring a desulfation cycle or replacement. Consult the full error code list in the manual’s appendix for a comprehensive understanding of each signal. Ignoring error codes can lead to battery damage or charger malfunction.

Maintenance and Storage
Regular cleaning and proper storage are crucial for longevity. Inspect cables for damage, and store the charger in a dry, cool place when not in use.
Cleaning the Charger
To ensure the longevity and optimal performance of your Schumacher 2 10 50 Amp Battery Charger, regular cleaning is essential. Before any cleaning procedure, always disconnect the charger from the power outlet to prevent electrical shock. Use a damp cloth to wipe down the charger’s exterior casing, removing any dust, dirt, or grime that may have accumulated.

Avoid using harsh chemicals, abrasive cleaners, or solvents, as these can damage the plastic housing and internal components. Pay particular attention to the charging clamps, ensuring they are free from corrosion. If corrosion is present, gently clean them with a wire brush or a specialized clamp cleaner. After cleaning, allow the charger to dry completely before storing or using it again. Consistent cleaning will help maintain the charger’s efficiency and reliability.
Proper Storage Procedures
When not in use, proper storage of your Schumacher 2 10 50 Amp Battery Charger is crucial for maintaining its functionality and extending its lifespan. Always disconnect the charger from the power source before storing it. Store the charger in a cool, dry, and well-ventilated location, away from direct sunlight, extreme temperatures, and moisture.
Avoid storing the charger in areas where it could be exposed to rain, snow, or other forms of precipitation. It’s best to store the charger in its original packaging or a similar protective container. Ensure the charging cables and clamps are neatly coiled and secured to prevent damage. Periodically check the charger during storage to ensure no corrosion or deterioration has occurred.
Cable and Clamp Inspection
Regular inspection of the charging cables and clamps is vital for safe and efficient operation of your Schumacher 2 10 50 Amp Battery Charger. Before each use, carefully examine the cables for any signs of damage, such as cracks, fraying, or exposed wires. Ensure the clamps are clean, free from corrosion, and securely attached to the cables.
Damaged cables or clamps should be replaced immediately to prevent electrical shock or fire hazards. Check the insulation on the cables for any breaks or weaknesses. If any damage is detected, discontinue use of the charger until repairs are made by a qualified technician. Proper maintenance extends the charger’s life and ensures safety.
Michael Schumacher ─ Background Information (Relevant to Brand)
Michael Schumacher’s racing legacy embodies precision and performance, mirroring the reliability and power delivered by Schumacher battery chargers, a brand honoring his name.
Early Life and Karting Career
Born in 1969 in Hürth, Germany, Michael Schumacher’s passion for motorsports ignited at a remarkably young age. His father, Rolf Schumacher, managed a local karting track, providing young Michael with early access and invaluable experience. He began competitive karting at just four years old, initially utilizing a pedal kart ingeniously constructed from salvaged parts.
Schumacher quickly demonstrated exceptional talent, achieving significant success in regional and national karting championships. This early dedication honed his skills and competitive spirit, laying the foundation for his future Formula 1 triumphs. His karting career culminated in victory at the 1987 German Kart Championship, signaling his readiness for higher levels of racing.
Formula 1 Successes and Championships
Michael Schumacher’s Formula 1 career is legendary, marked by unparalleled dominance and seven World Championships. He debuted with Jordan in 1991, quickly moving to Benetton where he secured his first two titles in 1994 and 1995. A pivotal move to Ferrari in 1996 initiated an era of unprecedented success for the Italian team.
Between 2000 and 2004, Schumacher achieved a historic five consecutive World Championships with Ferrari, solidifying his status as a racing icon. His seven World Championships remained a record until recently. All seven of Schumacher’s Formula 1 championship cars exemplify the perfect synergy between man and machine, showcasing peak performance and engineering excellence.
Current Health Updates (as of 01/27/2026)
Information regarding Michael Schumacher’s health remains largely private, nearly twelve years following his skiing accident in December 2013. Recent reports indicate a positive development: Schumacher is reportedly no longer bedridden. He is now able to sit in a wheelchair and is moved around the family estates in Mallorca and Switzerland by his private medical team.
Görner, a source close to the family, confirmed that Schumacher is not bedridden, dispelling previous speculation. While details remain scarce, this represents a significant step in his recovery journey. The family continues to prioritize his privacy and well-being, limiting public disclosures about his condition.
Warranty Information
The Schumacher charger is backed by a limited warranty against manufacturing defects. Coverage details, claim procedures, and duration are outlined within this manual for owner protection.
Warranty Coverage Details
This Schumacher battery charger warranty covers defects in materials and workmanship for a period of one year from the date of original purchase. The warranty applies to normal household use and does not extend to damage resulting from misuse, abuse, neglect, accidents, alterations, or unauthorized repairs.
Specifically excluded are damage to the battery itself, cables, clamps, and any components damaged by improper battery connection or charging procedures. Proof of purchase is required for all warranty claims. This warranty provides for repair or replacement of the defective unit, at Schumacher’s discretion.
Consequential damages are expressly excluded.
How to Claim Warranty
To initiate a warranty claim for your Schumacher 2 10 50 Amp battery charger, first, retain your original proof of purchase – a receipt or invoice is essential. Contact Schumacher’s customer service department via their website or phone number, readily available in the product manual.
Describe the defect in detail and provide your purchase information. You may be asked to ship the defective unit, along with a copy of your proof of purchase, to a designated Schumacher service center.
Shipping costs are the responsibility of the claimant. Upon verification of the defect, Schumacher will repair or replace the unit.